
eXcise Handguard Installation Instructions
Posted by Bexar Arms on Dec 30th 2020
Howdy Friend, and thank you for choosing to buy our eXcise series of handguards! Installation is pretty straight forward, but some care is required to achieve the best results.
Update 10/01/2023:
We have moved to a 7075-T6 aluminum barrel nut for our handguards, which can be identified by their tan color. These aluminum barrel nuts REQUIRE the use of our proprietary barrel nut wrench to avoid damage. The wrench is still reusable, so you only need one barrel nut wrench if you decide to buy multiple handguards.
We have also updated our barrel nut torque spec. Please torque the barrel nut to 65 ft/lb using our proprietary barrel nut wrench.
Required Installation Tools and Materials:
- Barrel Nut Grease - AeroShell 64 (formerly 33MS) recommended, any automotive grease free of graphite is ok to substitute
- Blue Threadlocker - Oil Tolerance highly recommended (Loctite 243, Vibra-Tite 122, Permatex 24027/243, etc.)
- Degreaser - Acetone, denatured alcohol, brake cleaner, etc.
- Vise - Bench mounted vise for holding the upper for barrel nut installation
- Upper Vise Block - Holds the upper receiver firmly in the vise without damaging it (clam shell style recommended for barrel nut removal/installation, reaction rod style recommended for muzzle device removal/installation)
- Barrel Nut Wrench - Our 7075-T6 aluminum barrel nuts require the use of our custom barrel nut wrench
- Torque Wrench - 1/2" or 3/8" foot pound torque wrench for the barrel nut, 1/4" inch pound torque wrench/Wheeler Fat Wrench for the clamping screws and gas block screws
- Breaker Bar - 1/2" or 3/8" to match your torque wrench for barrel nut installation
- Allen/Hex Wrench - 5/32" for the handguard clamp screws, 3/32" for most gas block set screws
- Armorers Wrench - For installing the muzzle device and removing Mil-Spec barrel nuts. 3/4" or 19mm box end wrench can also be used for installing most muzzle devices
Preparation:
- Begin by ensuring that the firearm that you're working on is unloaded and the area is clear of any ammo or magazines.
- If necessary, separate the upper and lower receivers, as well as set the BCG and charging handle aside.
- If you're replacing the handguard on an already finished upper, remove the installed muzzle device, gas block, and handguard. This may require additional tools not outlined above.
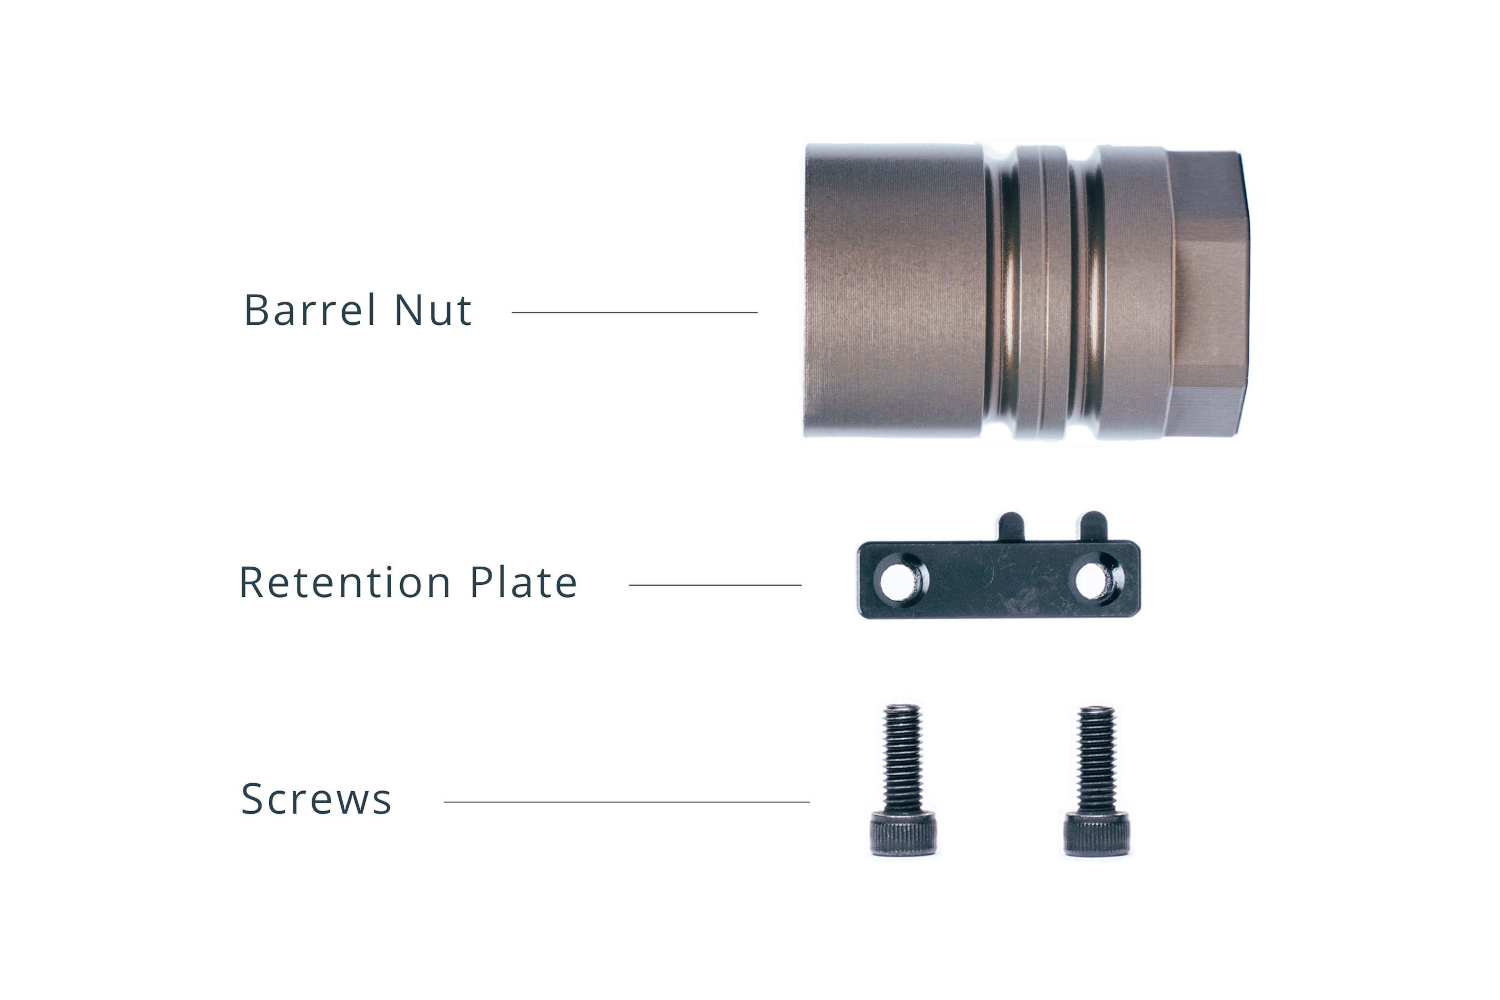
- Clean and degrease your eXcise handguard, barrel nut, clamping screws, and the Retention Plate.
- If your barrel nut is difficult to remove from the handguard when it first arrives to you, partially thread an upper receiver into the barrel nut. With a good grip on the upper receiver and handguard, pull them apart to remove the barrel nut from the handguard.
eXcise Barrel Nut Installation:
- Mount the upper receiver in the upper vise block and secure it firmly in your bench vise.
- Insert the barrel extension into the upper receiver, making sure the locating pin is pointing up and is in the notched area of the upper and is fully seated into the upper.
- Apply barrel nut grease to the threads of the upper.
- Slide the barrel nut over the barrel with the hex side facing the muzzle and thread on hand tight.
- Set the 1/2" or 3/8" torque wrench to 65 foot pounds and attach to the barrel nut wrench. Our custom barrel nut wrench accepts both 1/2" and 3/8" drive sizes.
- Slide the barrel nut wrench onto the barrel nut and tighten to 65 foot pounds
- Remove the torque wrench from the barrel nut wrench and install the breaker bar.
- Break loose the barrel nut.
- Repeat steps 6-8 a total of 3 times to season the upper receiver threads.
- Our barrel nut does not need to be timed to the gas tube. Once final torque is achieved, your barrel nut is installed and ready to go!

Gas Block and Gas Tube Installation:
- With the assembled gas block and gas tube of the appropriate size and length for your barrel, slide the gas block and gas tube over the barrel and onto the gas block journal. Low profile set screw style gas blocks highly recommended, clamp on gas blocks may need modification to fit or may not fit at all with our handguards.
- Apply blue thread locker to the gas block screws.
- Ensure the gas block and gas tube are properly aligned to the gas port on the barrel and tighten in place with the 3/32" hex wrench. For set screw gas blocks, we recommend 25 to 35 inch pounds using either a 1/4" drive torque wrench or a tool like the Wheeler Fat Wrench. If your gas block manufacturer recommends a different torque spec, please follow their instructions. We also recommend that your barrel is dimpled when using a set screw gas block for the most secure installation possible. If you need assistance dimpling your barrel, we are happy to help. Click here to learn more about our barrel dimpling service.
eXcise Handguard Installation:
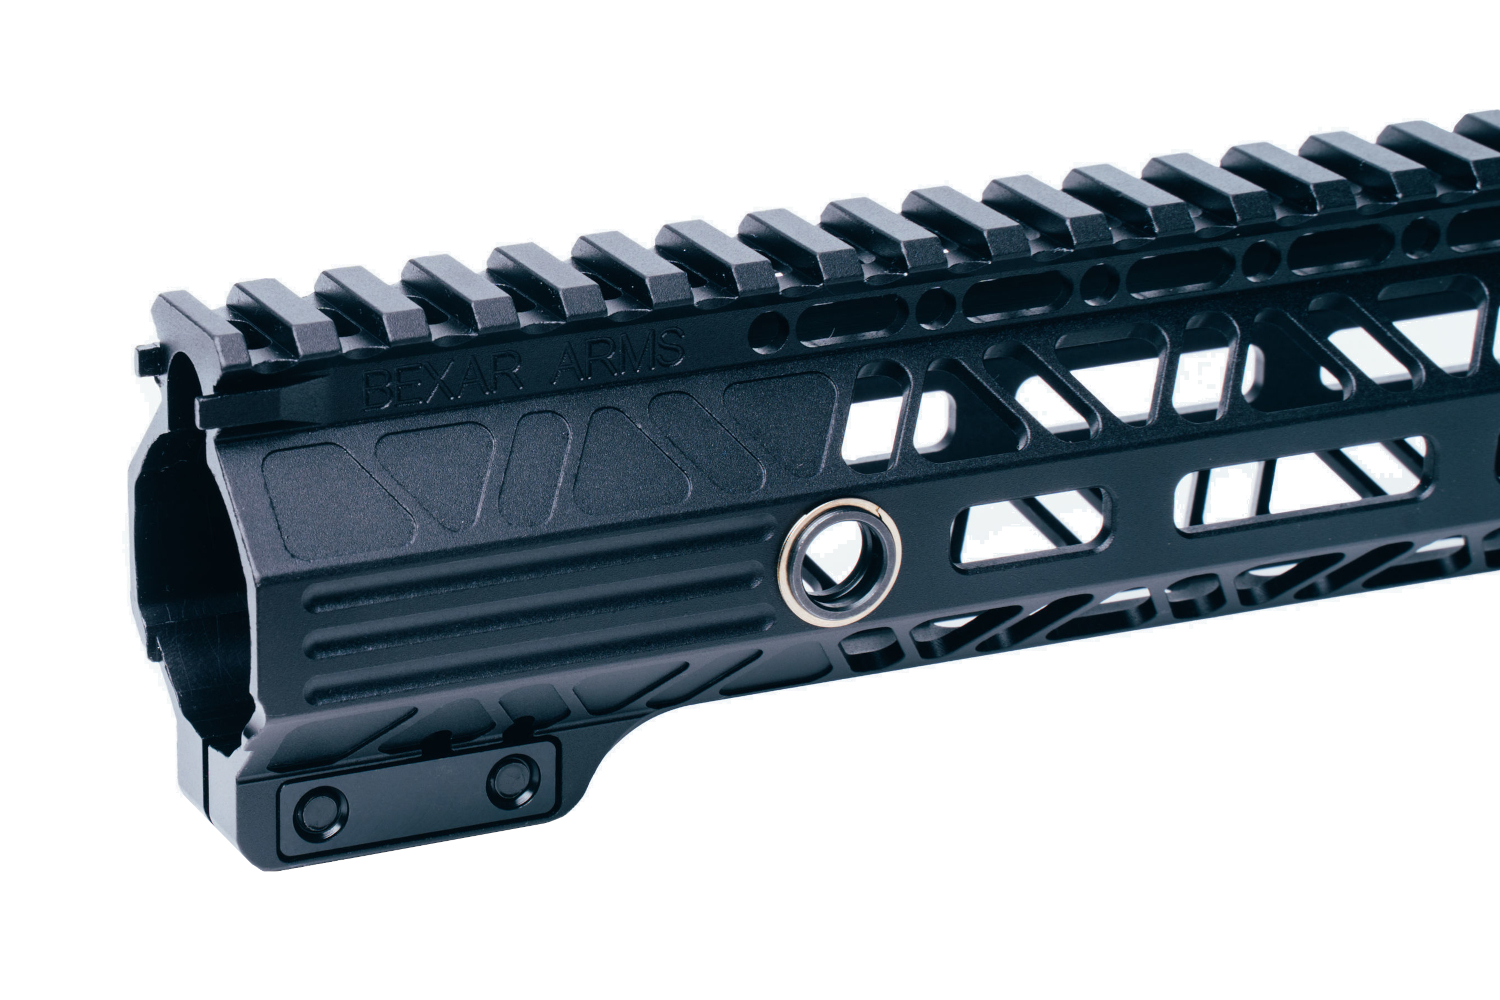
- Slide the handguard over the barrel, gas tube, gas block, and barrel nut. Ensure the handguard is flush against the upper and that proper alignment with the top rail of the handguard and the top rail of the upper receiver is achieved. The top of the handguard being perfectly flat to the top of the upper receiver is more important than if the edges of the rails are aligned.
- Insert the Retention Plate into the pocket on the bottom right side of the handguard and apply Blue Threadlocker towards the tips of the clamping screws.
- Start the screws by hand with the 5/32 hex wrench until finger tight. Torque both screw to 25 inch pounds with a 1/4" torque wrench or a tool like the Wheeler Fat Wrench.
- Continue to torque both screws to 25 inch pounds, alternating between fasteners until both fasteners stop moving. This ensures both screws are clamping evenly. Additionally, our clamping screws thread into our retention plate for a solid steel on steel connection. There's no aluminum threads to strip or helicoils to pull out.
 Congratulations, you've installed your new eXcise Handguard!
Thank you so much for your purchase of our handguard. Please let us know if you need any additional help or clarification, or if there's anything else we can help you with :)
Phillip